Saturday, April 18, 2015

Christopher's Construction Party

Our son, Christopher, turned 3 this month. He loves anything to do with construction ... construction trucks, signs, all tools, hard hats etc. ... and so it was easy to pick a theme for his party. I found a bouncy house in the shape of a digger a few months back and it was a go! The color theme was orange, yellow and black. It was so much fun to decorate the house and I must admit I went a little crazy with the caution tape! I found so many great ideas on Pinterest and I hope by sharing my party with you I will be paying it forward. Feel free to message me in the comments if you have any questions where I found things (just be sure to leave contact info).

Outside Front of the House Decor:
This was the front walkway and door that greeted our guests. The ladder and tools are my husband's that I just decorated with caution tape and tied balloons to (not pictured).

The front door read "Caution 3 Year Old Ahead" and is a sign I made by hand from a poster board and sharpie I purchased at Walmart.

Favors:
When you entered our house there was a table full of hard hats and tool belts. The hard hats I purchased from Amazon.com and the tool belt are from Home Depot (.77 cents each).

I used our chalkboard and wrote "Welcome Workers! Grab your uniform and report to Site Supervisor Christopher." As kids arrived we let them pick which color of hat they preferred and then tied on their tool belt and explained what was inside.

Each tool belt contained a construction party blower (found on Amazon.com) and then Work Orders (see explanation later in this post).

My husband made a logo for our son's pretend construction company. We printed and cut them out as circles and taped them on the front of the hats. They read "Christopher Lehmann Destruction Inc. Crew". ;)

For the favor, each child received a small truck in a bag filed with whoopers (boulders) and recces pieces (pebbles) when they left. The trucks come in a 5 pack and can be bought at Target, Walmart or Amazon.com. The favor tag was found online and can be downloaded here: Link

Inside Decor:
Let me tell you, decorating your house with caution tape is way too much fun! This is our front room and I simply taped up caution tape and a bunch of signs (the one on the mirror came in a four pack that I purchased from Amazon.com). I then added a cone and dump truck that we already owned to the toy dresser and we were set.


Also if you want to keep your party guests out of certain areas of your home caution tape and a "Danger Keep Out" sign works great and totally fits the theme!


Port-a-Potty sign on the bathroom door! Port-a-potty sign found here: Link

See I told you I went a little crazy ... I even decorated the bathroom!

I love this "Workers Present" sign I found online and I put it above the mantel since all the presents would go in this room. The sign can be download here: Link. I made the 3 banner using the leftover poster board from the sign on the front door and the "Party Zone" sign. The 3s were cut out of black construction paper and glued on to the poster board.

One of my favorite decorations went behind our food table. I simply taped caution tape and black and orange streamers in a repeating pattern at the top of our cupboards and then let them hang to the floor. It created a dramatic look for practically nothing!

Food:
The food table decorations included a "Dig In" banner that my husband designed and printed on card-stock (I had found a pack of oranges/yellows at Michael's for $5). My husband also designed the food tags which labeled all the food as their constriction counterparts. My son already owned the three construction trucks and all the tools on the table and they added a fun touch! 

I found the adorable idea of calling the cutlery "tools" on Pinterest. I already had a paint can from my daughter's painting party and just crumbled up some napkins on the bottom of the can to give height to the forks and knives. The plate and napkin holder I just happened upon in the Target $1 bins.


For the food I kept it simple. I have made the mistake in the past of trying to make a bunch of fancy food from scratch for parties and have realized (1) kids don't eat fancy food (2) I will have no life/sleep the day/night before and morning of the party (3) it really is not worth the effort. So even though I still love going all out on party decor and details, I go pretty simple when it comes to food.


Drinks were lemonade and apple juice labeled as gas and diesel (another Pinterest idea). And the "Refuel Here" sign we saw on Pinterest and then my husband just redesigned it.
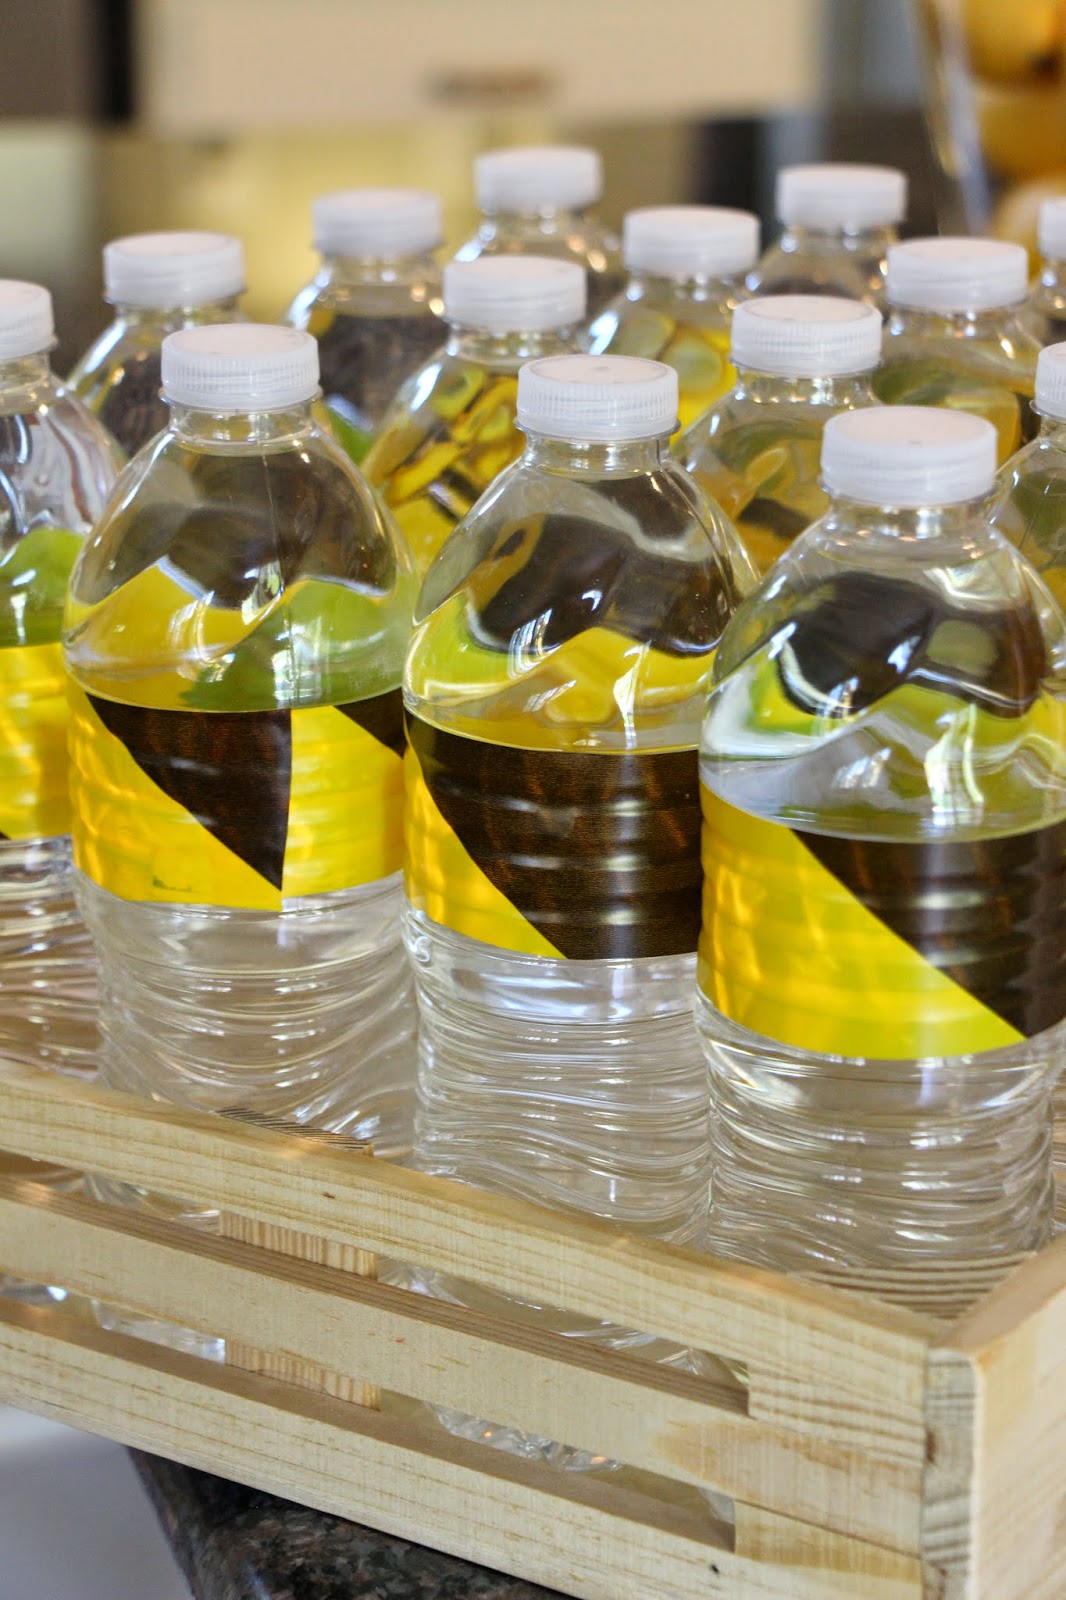
I bought some warning tape on Amazon.com for $4 and wrapped that on the water bottles to make them more festive. 

The dessert table was a lot of fun but again I kept it simple (everything was bought except for the dirt cups). We had a cake, build your own dirt cup station with four different toppings, and then mini cupcakes. The "Party Zone" sign was another sign I made out of poster board I found at Walmart. The "Build Your Own Dirt Cup" my husband designed.

The dessert table was decorated with caution tape and again tools we had around the house.

This is a Costco cake and it works perfectly for a construction party! I just added a few small trucks that I already had bought to give away as the favor and some smashed up Oreos as dirt and I was good to go! The candles I bought at Walmart.

I loved the idea of doing a build your own dirt cup station. I made the dirt cups ahead of time with chocolate pudding and crushed up Oreos. Then for toppings we had wafer cookies (2x4s), whoppers (boulders), recces pieces (pebbles) and gummy worms (worms). The kids LOVED it and had more than enough sugar during this party!

Dig In Dirt Cup Topper Here: Link

Cupcake Topper / Road Signs Here: Link

My husband made this fun, themed sign for the outside garbage can. 

Games/Things for guests to do:
 
The party was mainly in our backyard where we had a big bouncy digger, our play set/sandbox and tables set up.

On each table in the middle I put a construction cone (two for $1 at the Dollar Store) with a dump truck printout that I had printed on white card stock and cut out (Link). I then ran balloons from a weight inside the cone out the top (not pictured). On each table I also placed coloring sheets (Link), crayons, and fake legos from the Target dollar bin. 

"Work Orders" were in each child's tool belt which they received as they arrived. The "Work Orders" listed the different locations where, now as construction workers, they had to do their "jobs". There was the Bounce Zone (the bounce house), the Wrecking Zone (the wrecking ball game), the Dig Zone (the sand box) and the Build Zone (inside the house in the front room where there were blocks and Duplo legos for the kids to build with). The older kids were really into this and checking off each box! I found the general template here (Link) and then my husband tweaked it a little bit to make it more personal.

This is the Bounce Zone and as you can tell the birthday boy thought it was pretty cool!

The second zone was the Wrecking Zone (another Pinterest idea)! I wrapped a bunch of boxes in brown and white packing paper and drew bricks on the brown and wood grain on the white. The kids could stack them as high as they wanted and then pull back the wrecking ball and knock them over. The wrecking ball was an old ball that we tied twine to and then covered in Duct Tape. We then attached it to the top of our swing set. It was a HUGE hit!

The boxes.

Our little construction worker!

The third zone was the Dig Zone ... AKA the Sandbox!

I just filled the sandbox with my son's construction trucks and shovels and then sprinkled some fake Legos (again Target $1 bin) so that the kids had something fun to dig up.

The fourth and final zone was the Build Zone. In one room I put all our toys that kids could build with (i.e. connector blocks, wood blocks, Duplo Legos, train tracks etc.). This also became a great space for the babies and toddlers to play, away from the outside craziness.


Can you tell by his face he had an amazing day?!
Happy 3rd Birthday Christopher!

Thank you for checking out my party blog and if you are planning a construction party for a special little one in your life I hope this post gives you a few ideas!

Saturday, February 14, 2015

Julia's Frozen Party

My daughter Julia turned 5 this month and chose to have a Frozen party. We kept the party on the simple side this year. We hosted it at a local park from 2-4 pm and just served snacks, sweet treats and cake. It ended up raining (which it never does in Southern California!!) but it felt almost fitting for a Frozen party. That is, after all, Southern California's closest thing to snow ... I mean seriously, have you ever been here when it rains? It is as if you just got 10 feet of snow in Chicago. We freak! :)

I had fun making a birthday sign on our chalkboard with chalk.

Favors:
For one of the favors I actually got crafty! If you know me I love decorating but I am not very crafty! However, I saw this idea online and it seemed simple enough. These are no sew scarves. To make them, I bought a large amount of fleece fabric, cut it into large strips, and then cut both ends of each strip into tassels. Since I didn't have the right tools at home (a T-Square and a good scissors) it took me longer than I expected but I persevered! I used these directions (Link) and found the fleece at Joann's. The final cost was only .60 cents a scarf!


The other part of the favor was a large wand (bought on Amazon.com) attached to a bag filled with Hershey's kisses, a Frozen themed heart with candy inside and some Frozen themed tattoos. 

Food:
For the food we served: Snow flurries (normal and caramel popcorn), snowballs (oranges), Olaf's noses (carrots in ranch dressing), icicles (string cheese), cake, fruit with snow flurry dip (cream cheese fruit dip), ice blocks (rice krispies treats), and a kiss to melt a frozen heart (Hershey's kisses). 

I was fortunate to find Frozen themed napkins, cups and straws at the Dollar Store and then just bought plain blue plates. I displayed everything in a tin I had bought after Christmas on clearance. 

Olaf's Noses and Orange Snowballs!


This was taken right after Julia arrived at the park. She was beaming!

Crafts/Games:
The main "thing to do" was suppose to be the playground but since it ended up raining I had to great creative at the last minute. I found Frozen stickers in the Target $1 bins, bought a make your own Valentine kit and printed out a bunch of Frozen coloring sheets. We also brought board games and some puzzles and it ended up working out great!

The first game we played was pin the nose on Olaf. I drew Olaf on white paper and then cut out a bunch of construction paper noses for the kids to stick on. The scarves made great blindfolds and the kids had a blast.


The second game and biggest hit of the party was the snowball fight! Now, as I have mentioned before, in Southern California we obviously don't get snow and so I had to come up with the next best thing. These are soft snowballs that are super simple to make, can be thrown without injury to the person getting hit, and are even washable and reusable! 

To make them simply visit your local Walmart and in the girls section buy the largest size (I believe it was 10/12) of white (non sheer) tights. They should be $2 each. I made 60 snowballs and I bought 5 sets of tights (made 12 snowballs out of each pair). Next buy pillow stuffing at a local craft store (Michael's or Joann's) with your 50/40% off coupon. Then open up the tights and stuff about a handful of the stuffing into one leg. If it seems like too little stuffing to form a snowball add some more. Next, tie a knot in that same leg just above the stuffing and pull nice and tight. Now tie a second knot directly above the first and pull tight again. Cut in between the two knots and you will have your first snowball. Continue stuffing, tying two knots and cutting and you should be able to make about 6 regular sized snowballs out of each leg. The top part of the tights I just discarded. After our party the snowballs were super dirty. I dumped them in my front loader, washed them on the delicate cycle and then air dried them. They washed up perfectly! 

Snowball Fight!!!!!


Cake:
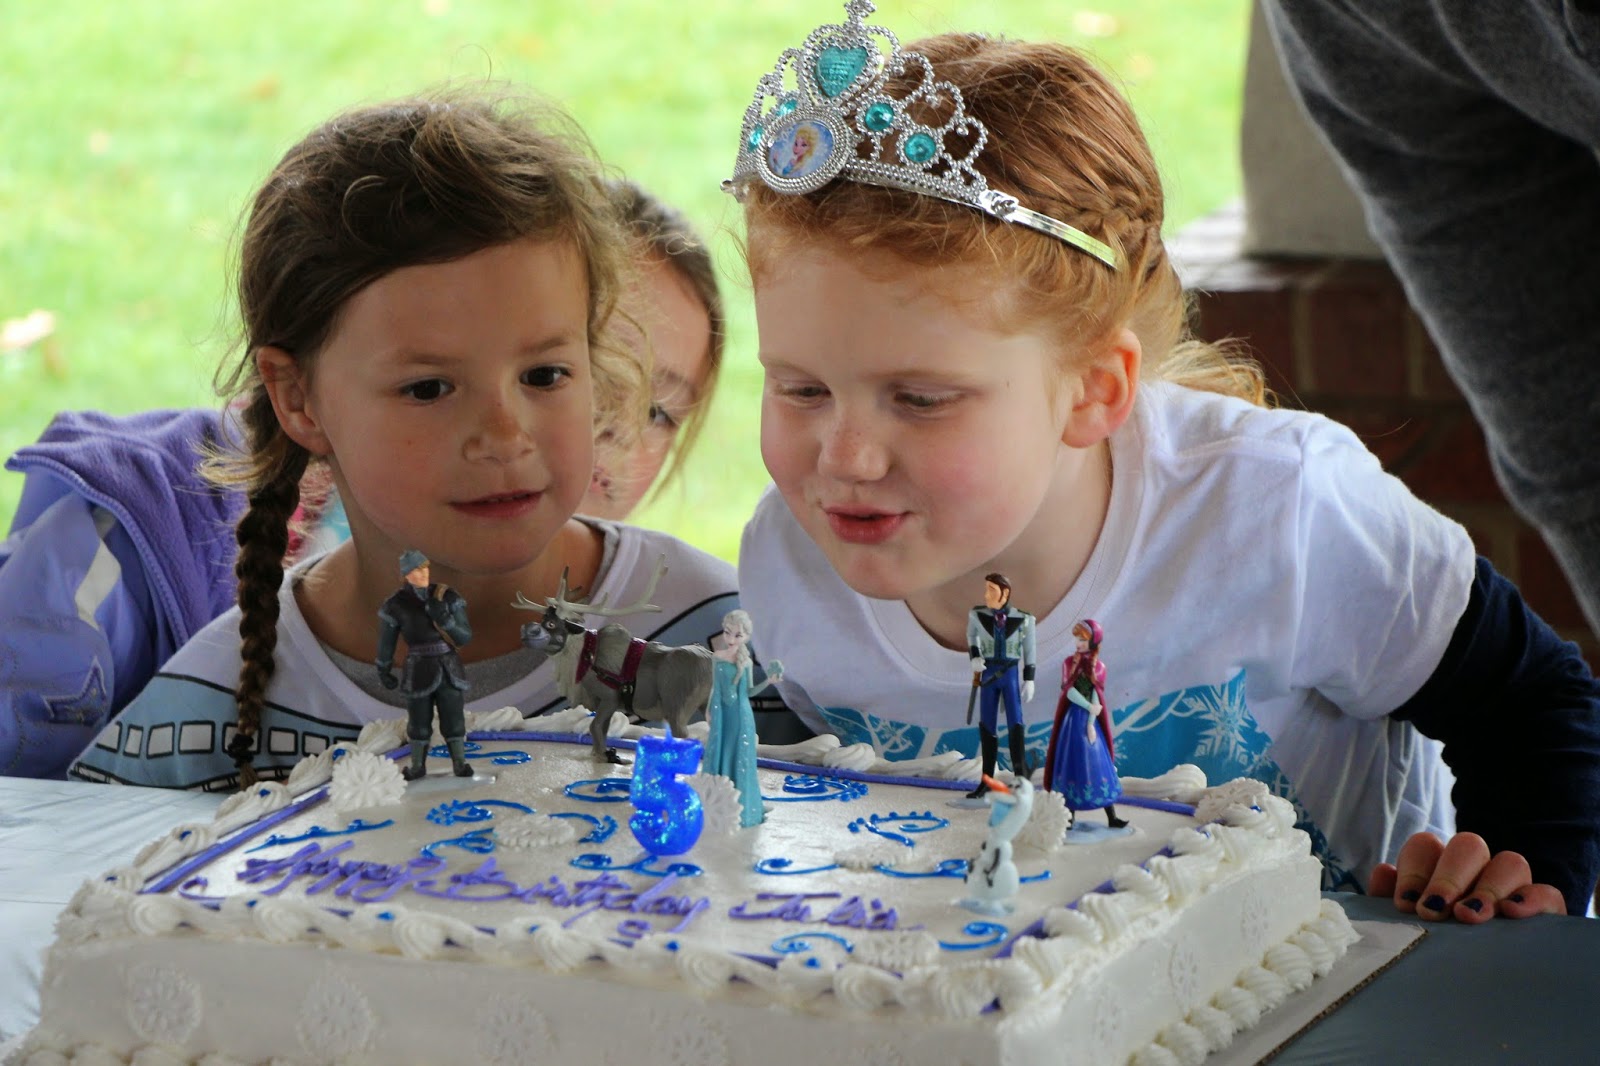
For the cake I went super simple this year and just ordered a Costco sheet cake which I decorated myself. Costco doesn't do themed cakes so I ordered a white sheet cake with a purple boarder and "Happy Birthday Julia". I then placed Julia's mini Frozen figurines from the Disney Store around the cake along with a 5 candle I found at Walmart. After Christmas I had found decorative, sugar snowflakes on clearance and used those around the edge of the cake and on the top. To add a little more color I purchased Wilson's blue sparkle gel and drew snow flurries around the Frozen characters. It was super simple to do and much cheaper than ordering it from a local bakery! 


Happy 5th Birthday Julia! We Love You!

Sunday, April 20, 2014

Christopher's 2nd Birthday

Christopher's 2nd birthday was also Easter this year so we had a simple, family birthday party after church. He loved the carrot cake and that he got to hunt for easter eggs on his birthday! :)

Happy 2nd Birthday Buddy!


Saturday, February 8, 2014

Julia's Painting Party

My daughter turned four this month and we celebrated her special day by hosting a painting party for her and her friends at a local pottery store. The theme of the party was "painting" (of course!) and I chose to decorate with primary colors.

We had 12 kids attend the party (including my daughter) and so I set up two tables for the kids to sit at. I decorated these two tables with paint splotches along the center (cut out free hand from construction paper) and bright balloons in the middle (each child took one home). I then laid out bright, colorful aprons at each spot. I had purchased one apron for each child to wear and take home as an added favor (They were purchased from Amazon: link). The aprons are an incredible value for what you get and although they are not super high quality they held up great for the party and were very bright and colorful! As an extra touch, I stenciled on each child's name to the apron using fabric markers.

For the food table I made a "Happy Birthday Julia" banner out of paint swatches that I had cut up and letters I designed and printed. I then decorated the food table with more paint splotches, two paint cans filled with colorful candy (found these paint cans at Micheal's), "paint brush" pretzel sticks I had made and a painters pallet my husband cut out of wood and painted white. On top of the painters pallet we placed bright cupcakes to look like primary paint colors. It was such a fun and a very easy party to put together!

When everyone arrived my mom did face painting for the kids and then we all had lunch together. After everyone had finished lunch, my daughter and each of her friends got to pick a small ceramic piece to paint. The place where we hosted the party, World of Color in Burbank, CA, provided all the ceramic pieces and paint and was a huge help with the kids. After the kid's finished putting their artistic touches on each of their pieces we sang happy birthday and had cupcakes. By then it was time to go home and we sent everyone home with their personalized apron, a paint kit (inside which I had designed and printed a thank you message from my daughter), a "color wheel" lollipop with paint brush attached and a balloon. In a week, each child will be able to take home their ceramic piece as another memory of this fun day!

The invitation I designed

Aprons for every birthday guest

The kids tables


The food/dessert table

A painters pallet filled with colorful cupcakes


The birthday favors